Gene Set Enrichment Overview
Introduction to the Gene Set Enrichment Analysis (GSEA) Capsule.
This Streamlit application streamlines Gene Set Enrichment Analysis (GSEA) for experimental biologists, enhancing their ability to interpret genome-wide expression data (see Gene set enrichment analysis: A knowledge-based approach for interpreting genome-wide expression profiles for more details). The application speeds up processing using parallel computation and employs statistical methods like the Fisher's Exact Test, Hypergeometric Test, and Chi-Squared Test to calculate P-values. It also adjusts these values for false discovery rates using the Benjamini-Hochberg correction. The application presents its findings through interactive charts and bar graphs, providing users with a clear and direct visual representation of significant gene sets and their associated biological pathways. This approach makes complex data analysis more accessible and easier to understand.
The application includes Gene Ontology libraries for Biological Processes, Cellular Components, and Molecular Functions from Human MSigDB Collections to reduce the need for manual input and accelerate the analysis process. Gene Ontology is used for annotation as it is widely recognized and commonly used due to its comprehensive yet user-friendly structure. It provides a standardized vocabulary for describing gene roles across various biological entities.
Running GSEA in Code Ocean
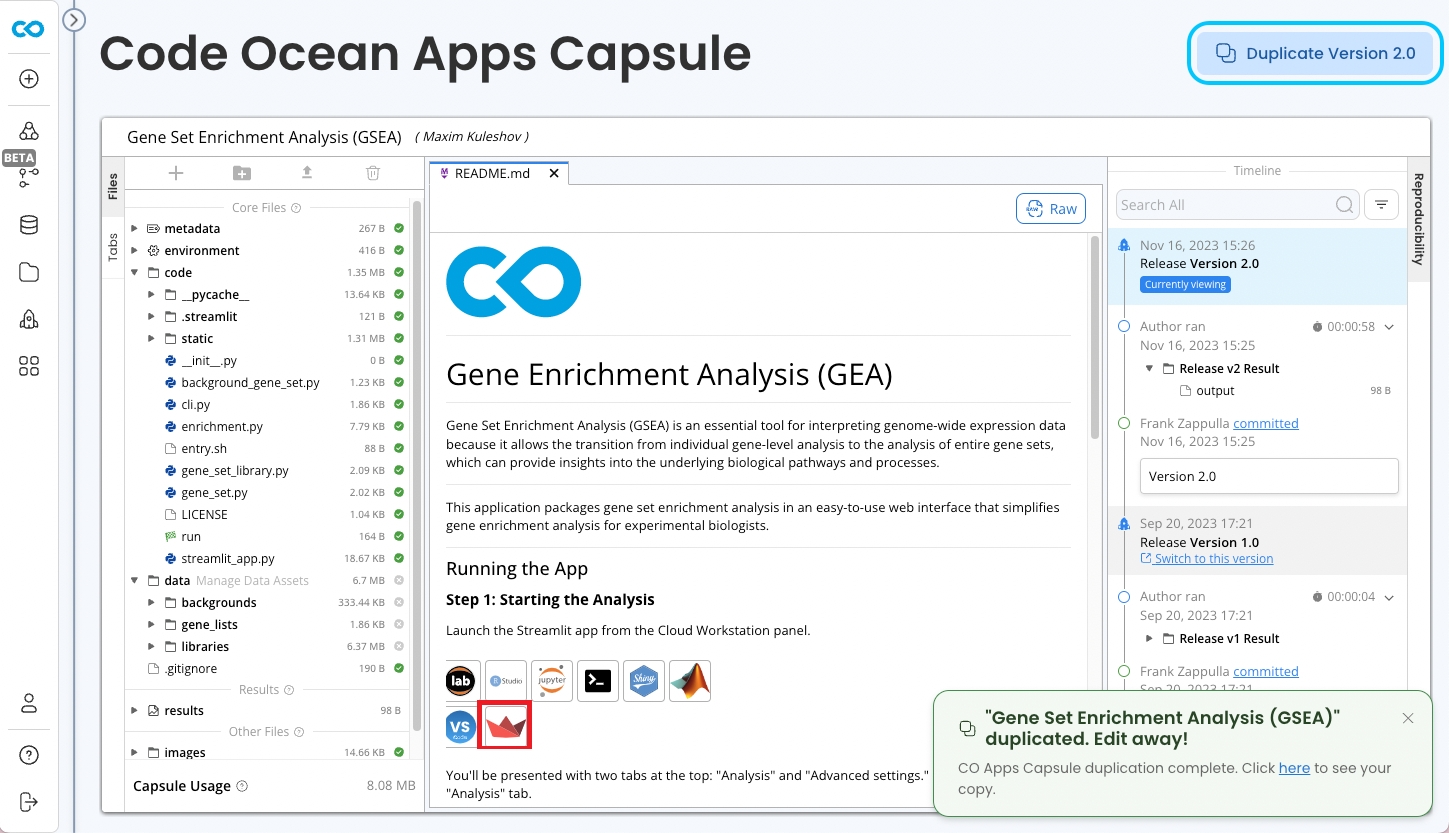
Duplicate Gene Set Enrichment Analysis (GSEA) from the Apps Library.
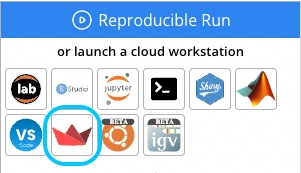
Once in the Capsule, launch the Streamlit App from the Cloud Workstation panel.
Using the GSEA Application
Analysis
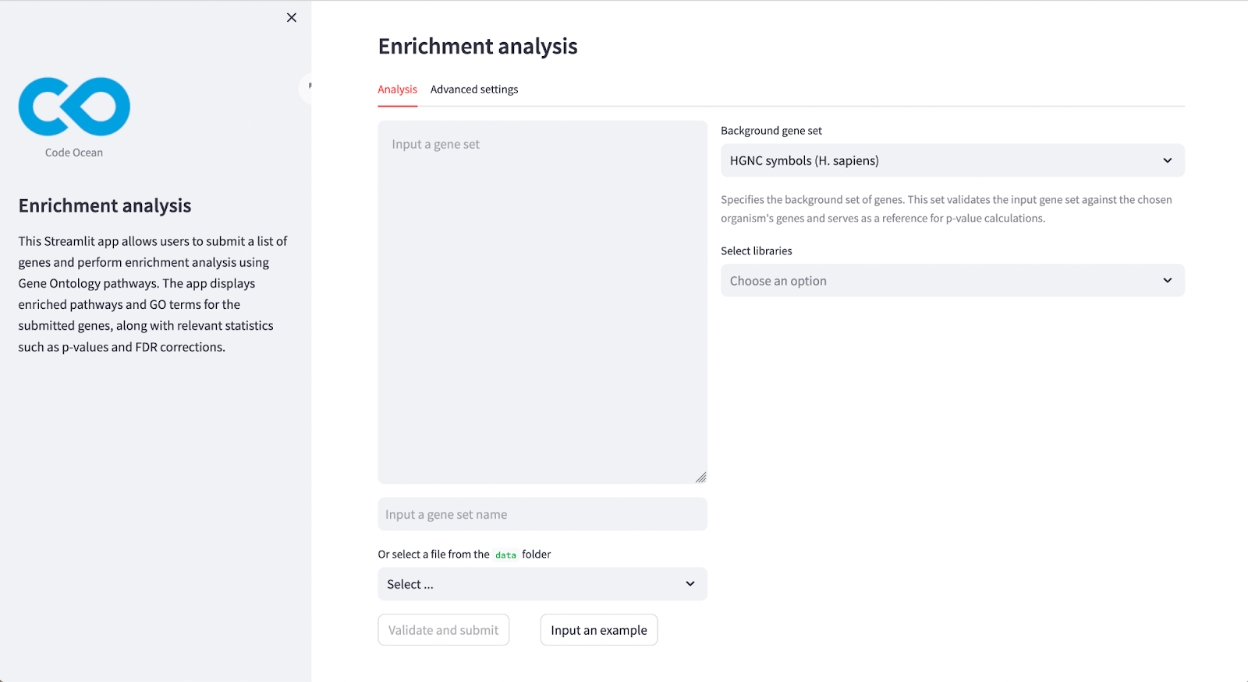
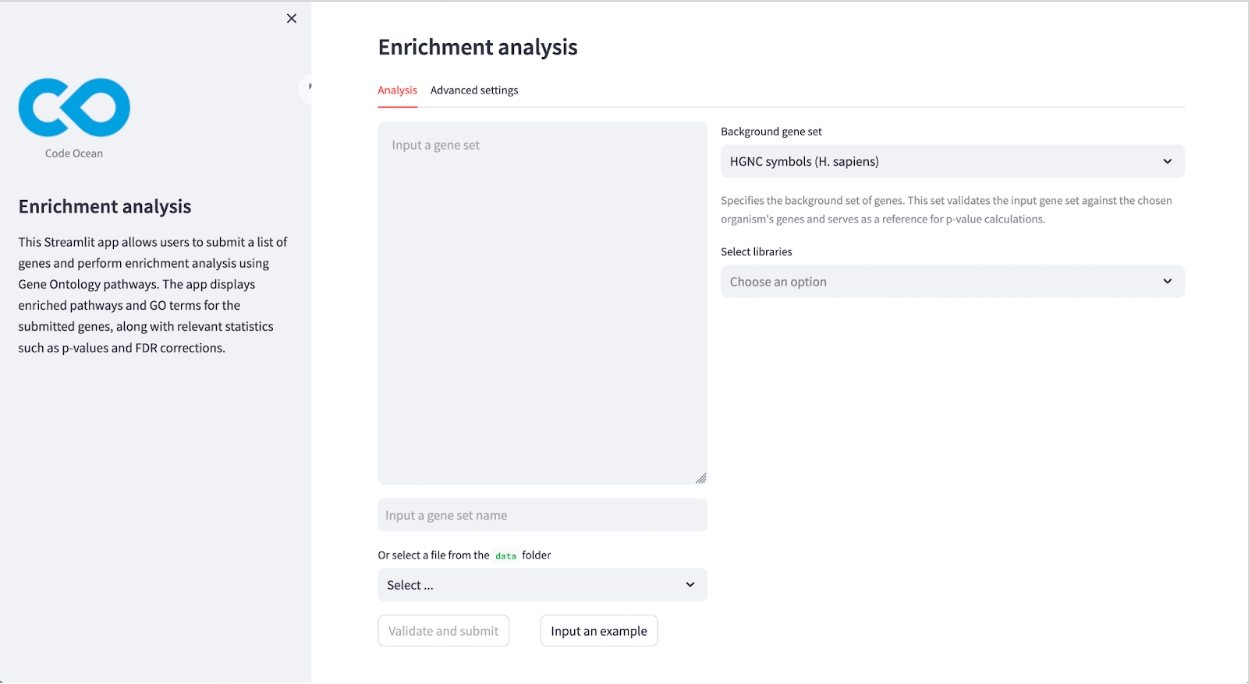
Once the Application has launched, you will be be presented with two tabs at the top:
Analysis and Advanced Settings
Begin using Analysis.
In the Input a gene set name field, enter a name for the gene set.
Below that, you have two options to input the gene set:
Test Input: Paste a newline-separated list of gene names directly into the provided text box.
File Selection: Click the "Select..." dropdown to upload a gene list from the local data folder.
Select the Background Gene Set by clicking the dropdown and choosing the appropriate set of genes (e.g., HGNC symbols for Homo sapiens) that will be used for validation and reference during the enrichment analysis.
Use the Select Libraries dropdown to choose the gene set libraries against which the input set will be analyzed.
Once you've inputted the gene set and made the selections, click on Validate and Submit to proceed with the analysis.
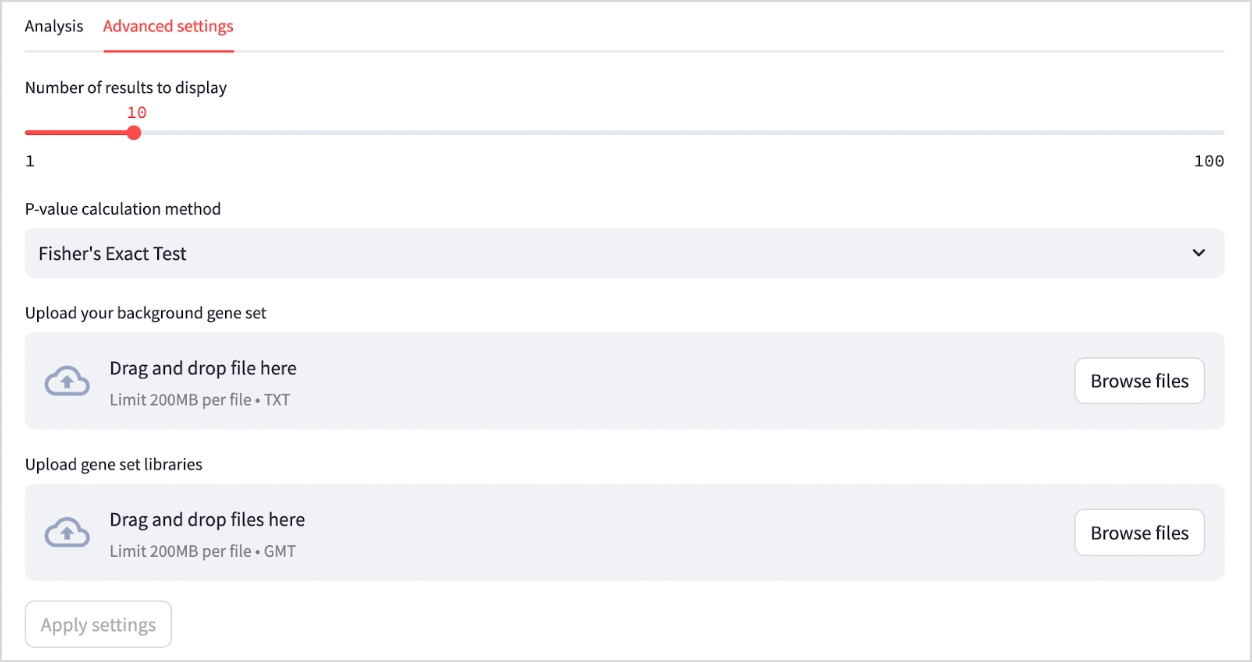
Advanced Settings (Optional)
Choose the number of results you want to display by adjusting the slider under Number of results to display.
Select the P-value calculation method from the dropdown menu. Options include Fisher's Exact test, Hypergeometric test, and Chi-Squared test.
You can upload the background gene set and gene set libraries by dragging and dropping files into Upload your background gene set or Upload gene set libraries.
Saving Results
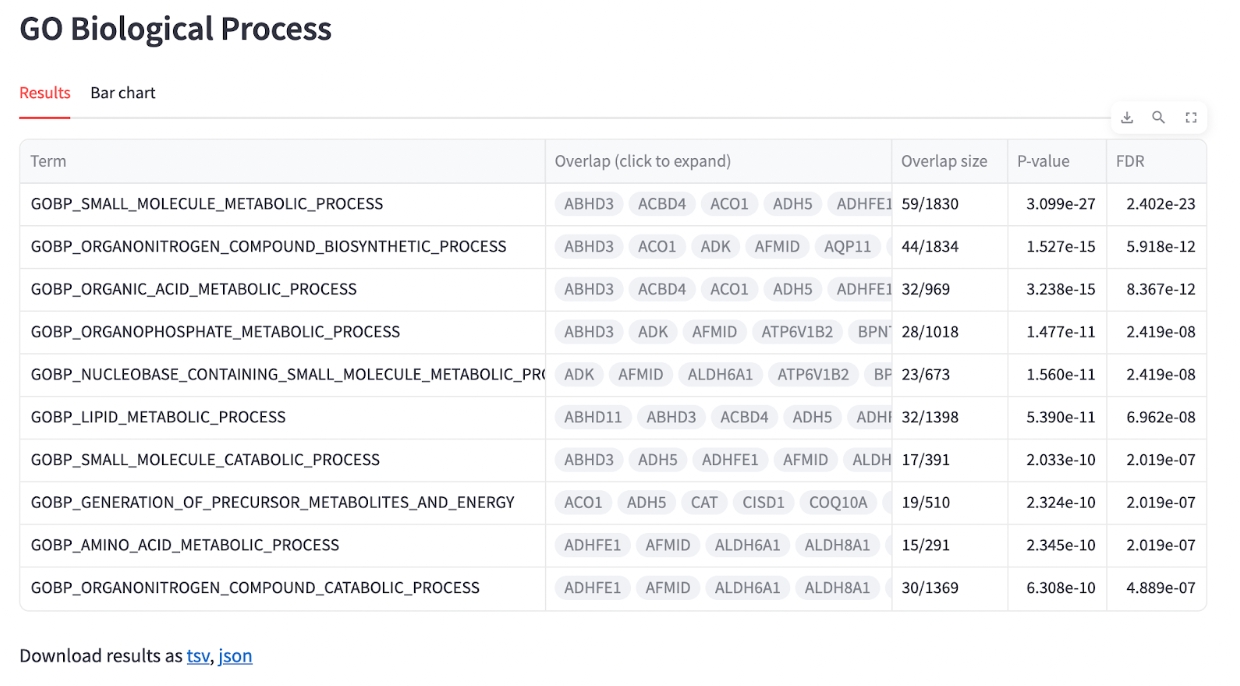
Once the analysis is complete, you can view the results in the interactive chart and bar graph.
Use a link on top of the results pane to save all library results in a single TSV file for a consolidated record. To save the results from each gene set library in TSV or JSON format, use links provided under results for each library.
All the results and metadata will be automatically saved as a json file in the results folder. The files will be named with the input gene set name and a time stamp for convenient access and future reference.
Reviewing the Analysis
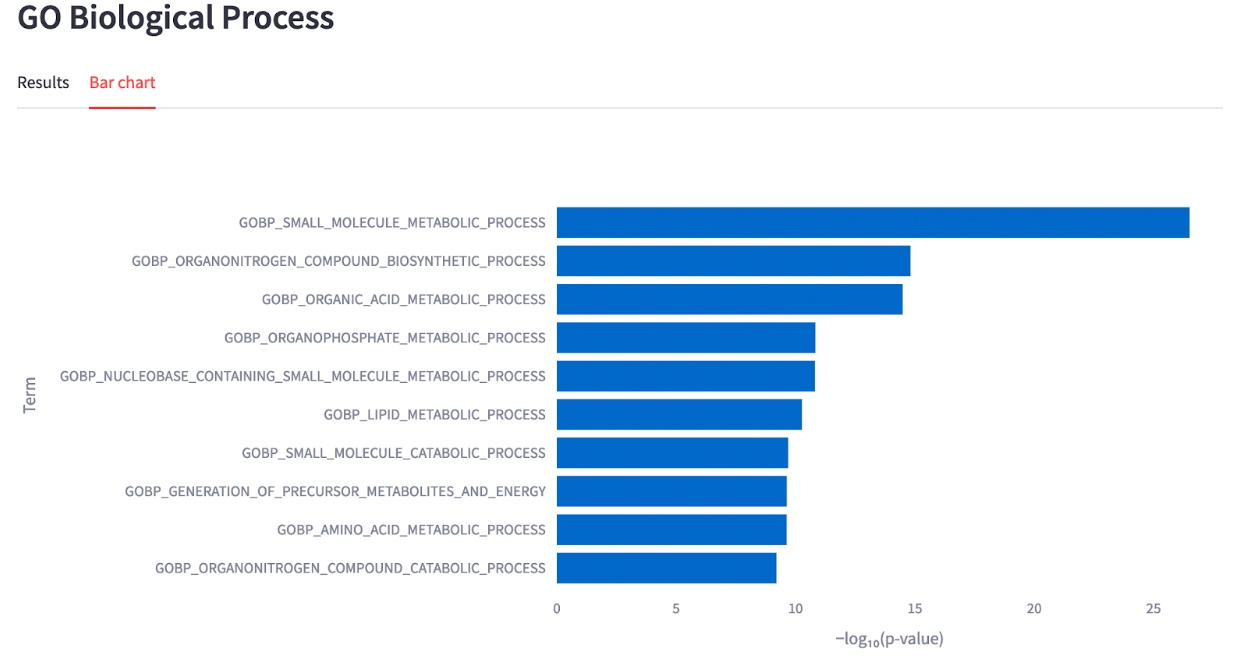
After completing the analysis, the application displays a table that details the term name, P-value, FDR, and gene overlap size for the top ten results in each library. Additionally, the application provides a bar chart, plotted on a −log₁₀(p‐value) scale, to offer users a straightforward overview of the enrichment results.
You can adjust the number of results displayed or re-run the analysis with different parameters or P-value calculation methods by returning to the "Advanced settings" tab.