Creating a New Data Asset
The process of creating new Data Assets is different depending upon the type of Data Asset being created.
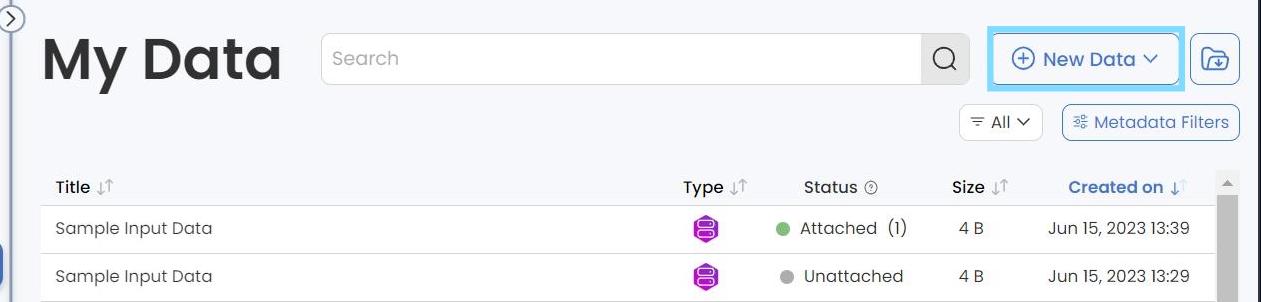
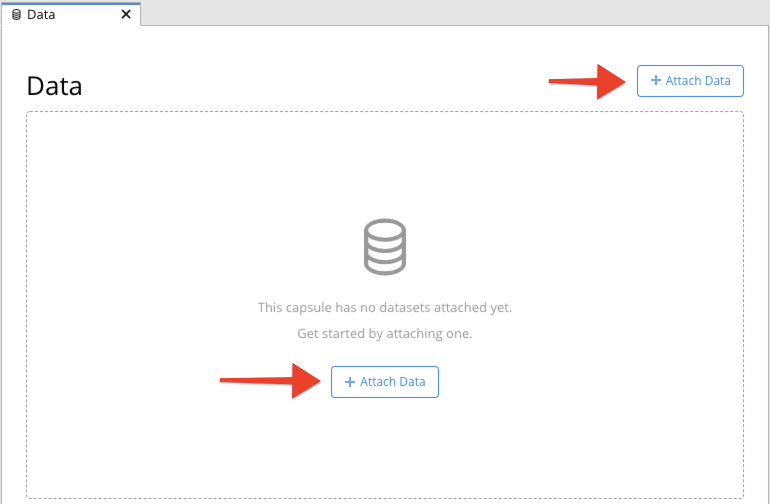
You can add a new Data Asset from the My Data page or from a Capsule/Pipeline:
Navigate to the My Data dashboard.
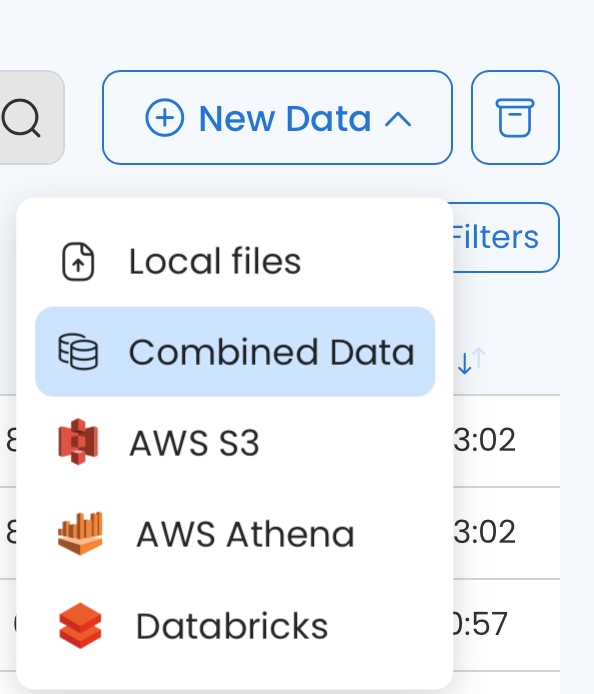
Click + New Data to create a new Data Asset.
After clicking on the + New Data an interactive form will appear.
By default, a new Data Asset is private (i.e. only the owner can see it). To learn more about sharing a Data Asset with others, go to Managing Data Assets.
Upload From Your Local Machine
Click + New Data.
Choose Local Files.
Drag & drop the file or folders you want to upload from your local drive or click Choose Files to browse.
Complete the fields:
Data Asset Name (required) — Use a meaningful name so that others can find the Data Asset easily.
Folder Name (required) — The folder name inside a Capsule. Use a name that’s similar to the dataset name. Spaces and some special characters are not allowed here.
Description (optional) — Add some text to make the Data Asset easy to find and understand.
Tags (required) — Tags are another way to help people find your Data Asset.
Custom Metadata — These are administrator-defined fields for which you can provide values.
Click Create Data Asset to finish.
You can upload a folder of files. The size of a single file to be uploaded is limited to 5GB while there is no limit for the size of the folder. However, the upload timeout is 24 hours.
There is no "resume on failure" which means that if the upload is interrupted (due to a timeout or other issues), you will have to start the upload again.
Import From a Cloud Provider
Click + New Data.
Choose AWS S3 or Google Cloud and then click Next.
Provide information about the bucket you want to use.
For AWS users, select Import from S3 Bucket. To add a remote Data Asset, read the next section: Establish an External Link to an AWS S3 Bucket.
You can upload the entire bucket or a specific folder.
For Private Buckets, if the Secret or Role is already in your Code Ocean account, the system will automatically use it to access the bucket. If there is no Secret or Role that provides access, you will be prompted to create a user secret (see Secret Management Guide if you need help creating a secret).
Complete the fields:
Data Asset Name (required) — Use a meaningful name so that others can find the Data Asset easily.
Folder Name (required) — The folder name inside a Capsule. Use a name that’s similar to the dataset name. Spaces and some special characters are not allowed here.
Description (optional) — Add some text to make the Data Asset easy to find and understand.
Tags (required) — Tags are another way to help people find your dataset.
Custom Metadata — These are administrator-defined fields for which you can provide values.
Click Create Data Asset to finish.
A single file can be specified in Path when creating an Internal Data Asset by importing from S3.
Note: Do not include the trailing / in the Bucket Name or leading / in the Path.
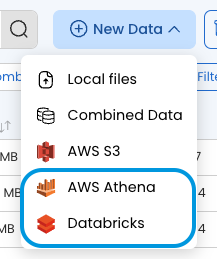
Import from a Data Connector
In addition to importing from AWS S3 and Google Cloud buckets, data can be imported from a variety of other external sources using the Data Connectors accessible via the "New Data" menu. These allow you to submit a query to the specified data source and automatically save the results as an Internal Data Asset. Details regarding using each of these Data Connectors are below.
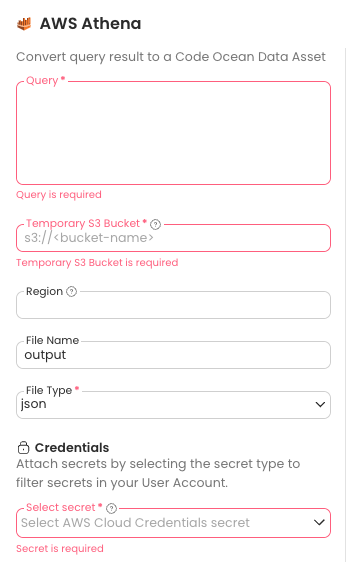
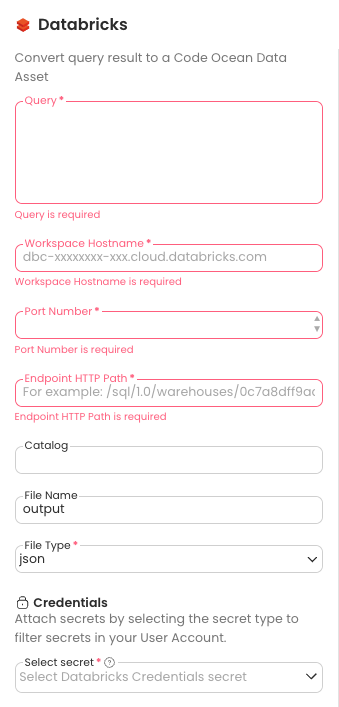
Provide the required information and add any optional tags, custom metadata, etc. Below is an explanation of the required information specific to the AWS Athena Data Connector.
Connecting to Databricks requires creating a Databricks secret from the Account page.
Query: This is the query that will run in AWS Athena to fetch your data. It's the results of this query which will be saved as a file in your new Data Asset.
Temporary S3 Bucket: AWS Athena requires an S3 Bucket to output the initial query results (referred to as OutputLocation in the Athena SDK).
File Name: The name you'd like to give the query output in your new Data Asset.
File Type: Select the file type for the output of the query.
Select Secret: This is the secret which will be used to access Athena and the temporary S3 output bucket.
Establish an External Link to AWS S3 Bucket
Click + New Data.
Click AWS S3 and then click Next.
Specify the Bucket Name and the Folder Name.
Select Link to S3 Bucket.
You can upload the entire bucket or a specific folder.
For Private Buckets, if the Secret or Role is already in your Code Ocean account, the system will automatically use it to access the bucket. If there is no Secret or Role that provides access, you will be prompted to create a user secret (see Secret Management Guide if you need help creating a secret).
Complete the fields:
Data Asset Name (required)—Use a meaningful name so that others can find the dataset easily.
Folder Name (required)—The folder name inside a capsule. Use a name that’s similar to the dataset name. Spaces and some special characters are not allowed here.
Description (optional)—Add some text to make the dataset easy to find and understand.
Tags (required)—Tags are another way to help people find your dataset.
Custom Metadata — These are administrator-defined fields for which you can provide values.
Click Create External Data to finish.
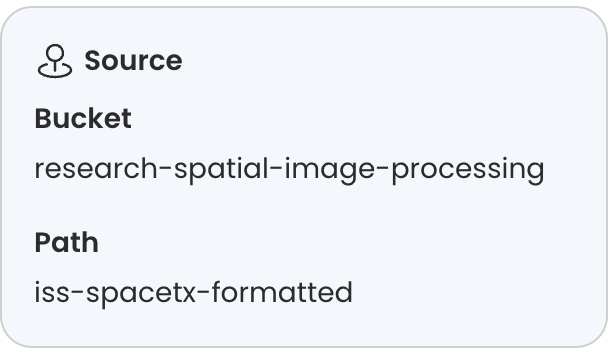
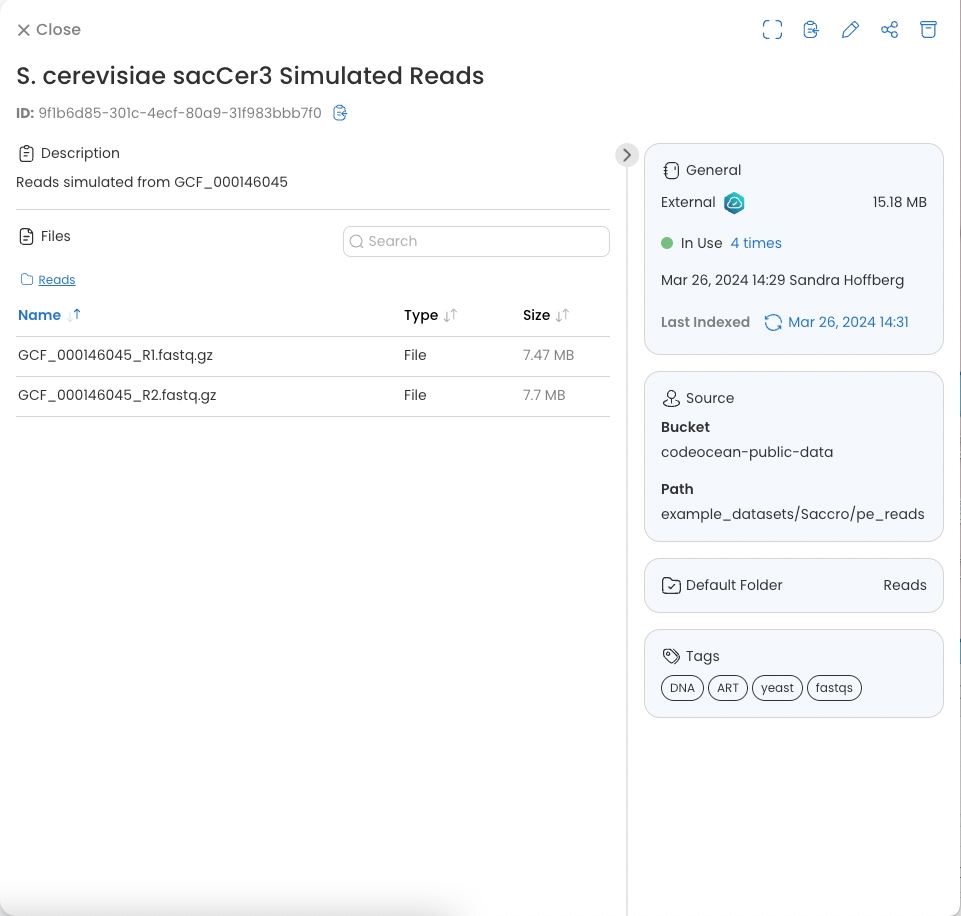
To improve the traceability of Data Asset sources when created from an S3 bucket, there is a “Source” block in Data Asset details.
When viewing the contents of an imported/linked S3 bucket Data Asset, the original s3 bucket of the data source as well as the relative path to a subdirectory (if contents are not at the root of bucket) are viewable.
Indexing an External Data Asset
External Data Assets are indexed upon creation and contents can be viewed in the Data Asset UI.
When an external dataset it will be immediately available to be attached to a Capsule in a Cloud Workstation even if indexing has not fully completed.
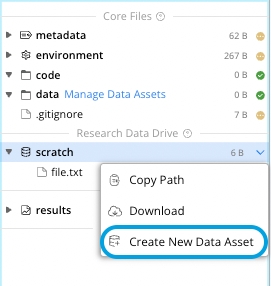
Create a New Data Asset from the Scratch Folder
To create a Data Asset from the /scratch folder in a Cloud Workstation:
From the dropdown list click Create New Data Asset.
2. Complete the fields:
Data Asset Name (required)—Use a meaningful name so that others can find the dataset easily.
Folder Name (required)—The folder name inside a capsule. Use a name that’s similar to the dataset name. Spaces and some special characters are not allowed here.
Description (optional)—Add some text to make the dataset easy to find and understand.
Tags (required)—Tags are another way to help people find your dataset.
Custom Metadata — These are administrator-defined fields for which you can provide values.
Combine Data Assets
To create a Combined Data Asset,
Click + New Data.
Choose Combined Data.
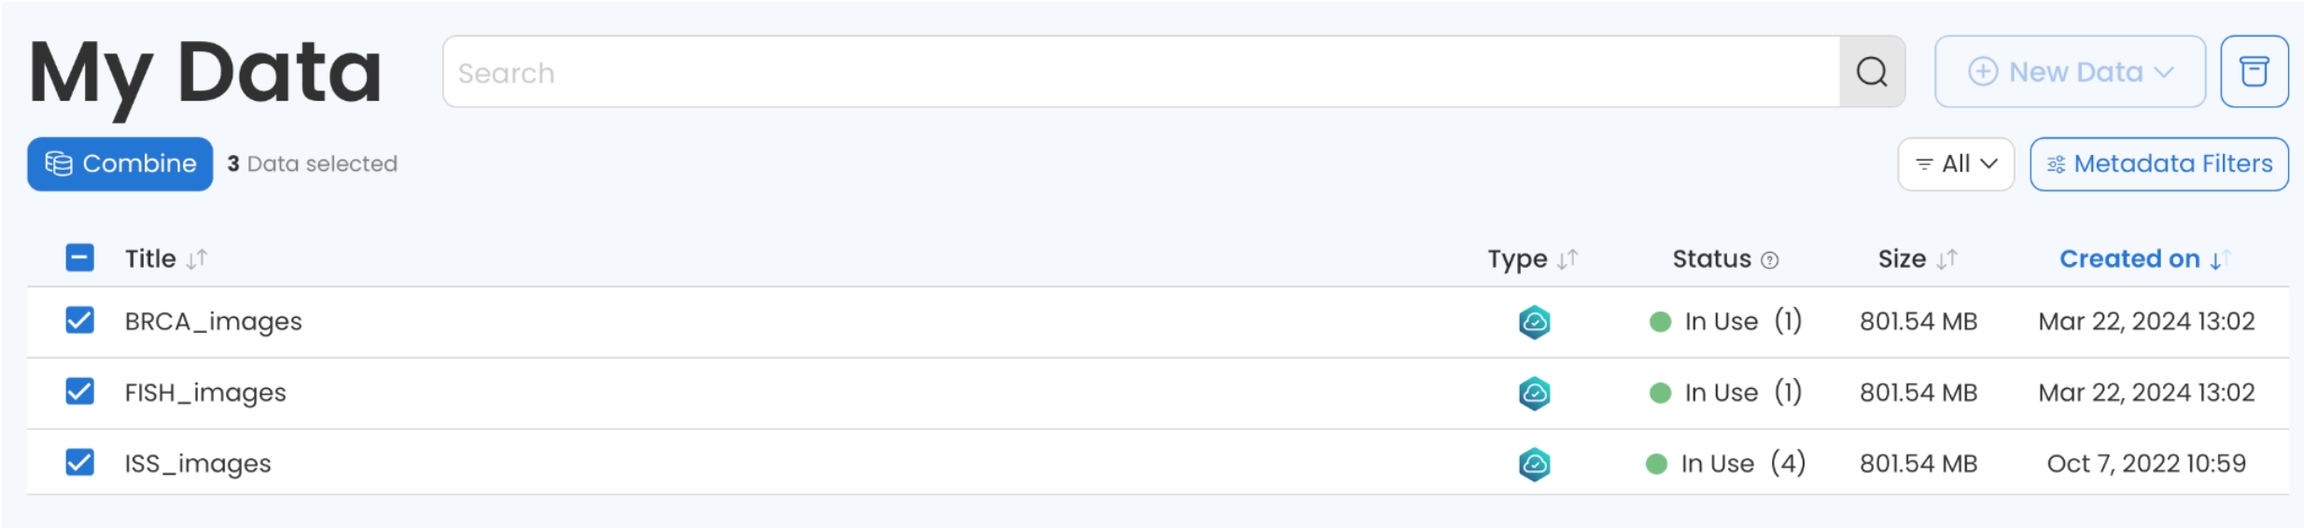
Check the box next to the External Data Assets you want to include in the Combined Data Asset.
Press Combine.
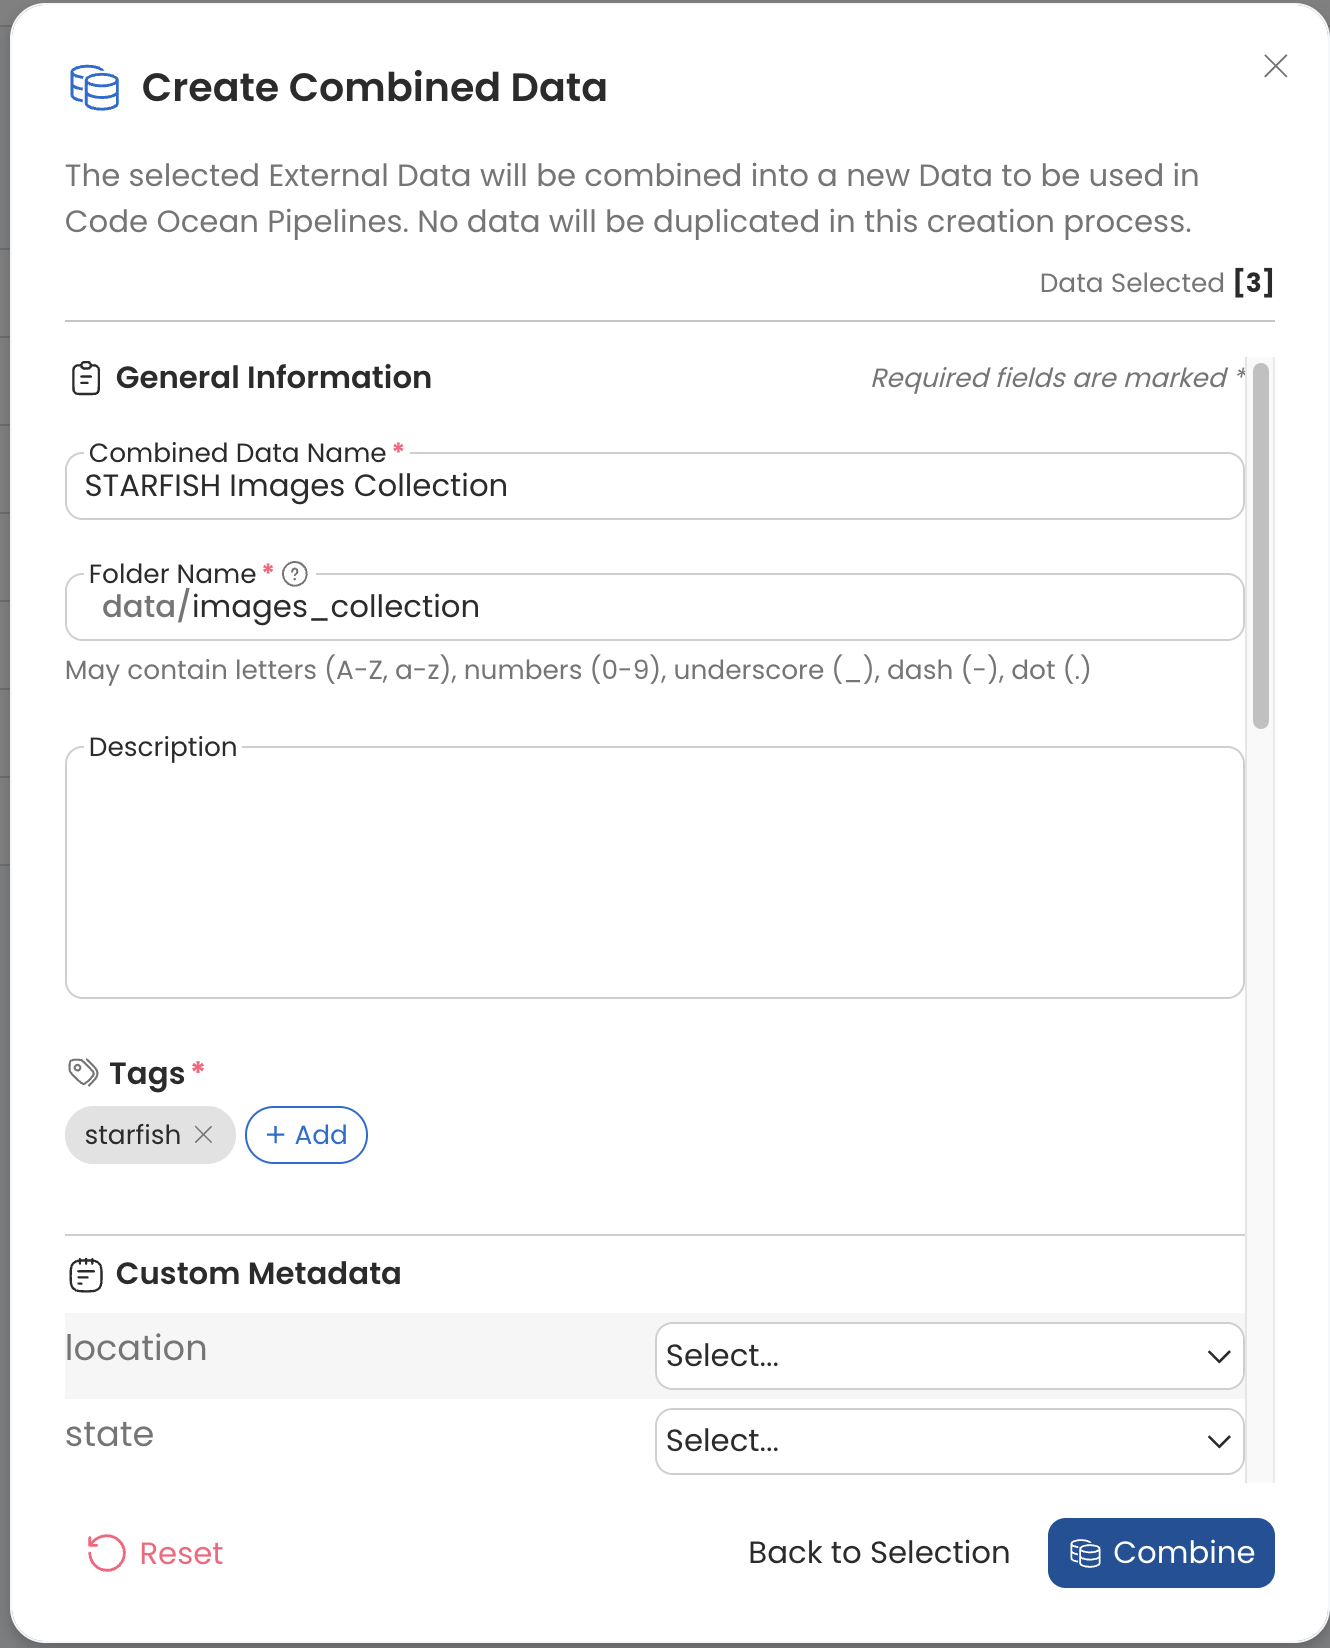
Complete the fields:
Combined Data Name (required) — Use a meaningful name so that others can find the Data Asset easily.
Folder Name (required) — The folder name inside a Capsule. Use a name that’s similar to the dataset name. Spaces and some special characters are not allowed here.
Description (optional) — Add some text to make the Data Asset easy to find and understand.
Tags (required) — Tags are another way to help people find your Data Asset.
Custom Metadata — These are administrator-defined fields for which you can provide values.
Click Combine to finish.
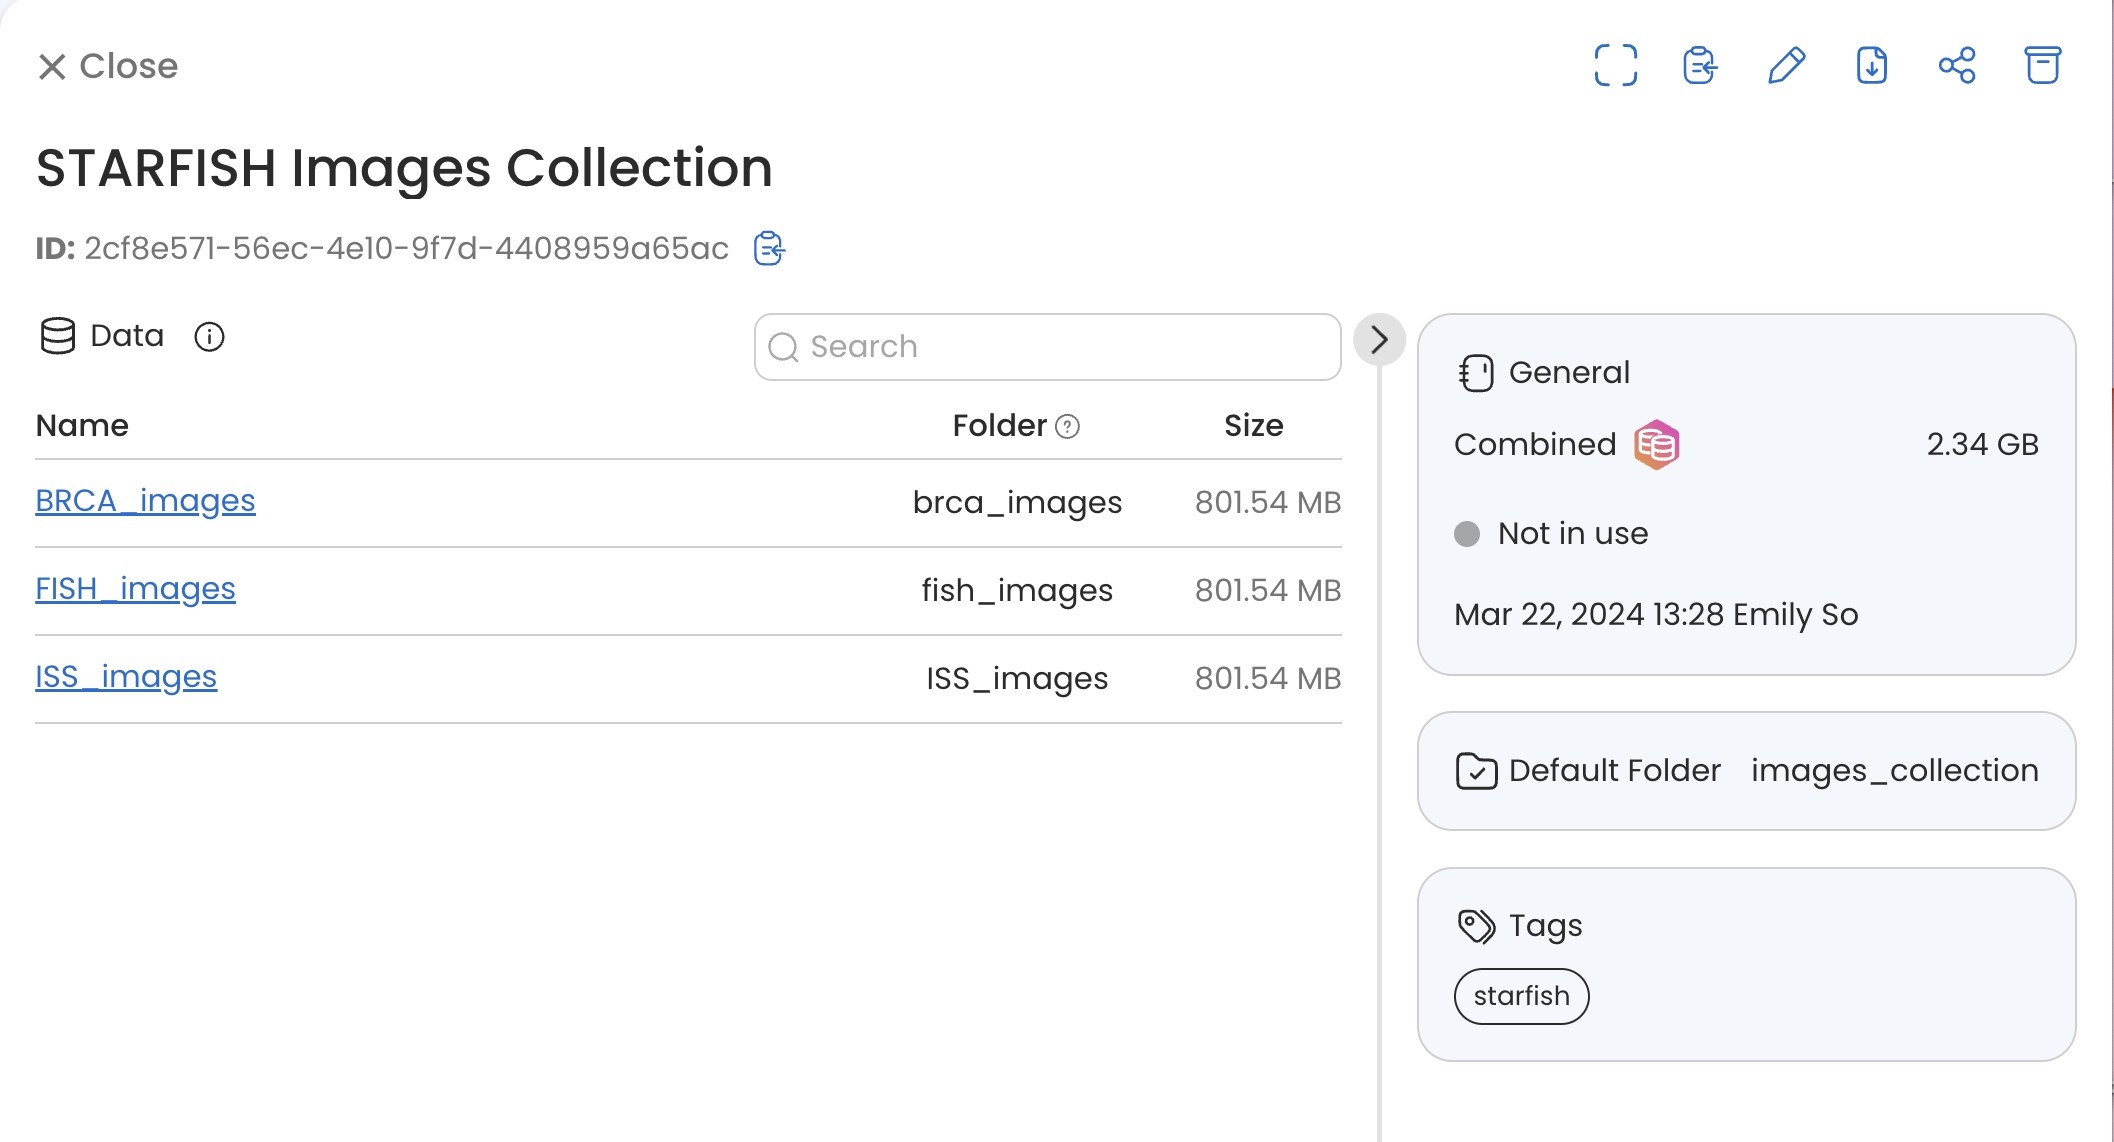
Once Created, you'll be able to see your Combined Data dataset in your data library
To run a Pipeline with a Combined Data Asset, Assumable Roles must be configured in your deployment by a Code Ocean admin.