Create a Pipeline in 5 minutes
Pipelines allow users to separate steps of a workflow into reusable pieces, automate the start of subsequent steps, specify resources individually, and parallelize workflows by connecting Capsules.
Create a new Pipeline
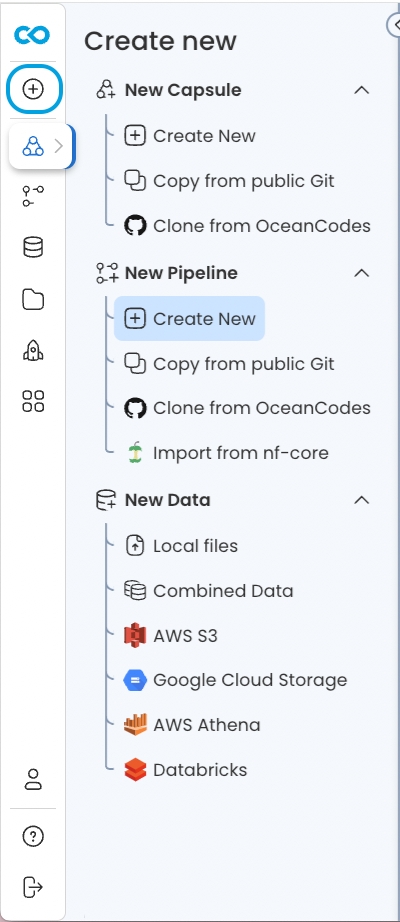
Click on the plus sign in the top right corner to create a new research product. Users can create a new Pipeline, copy from a public git repo, or clone from a private git repo. In this case we will Create New.
Cloning from your organization's private Git account enables the use of Code Ocean's Git Sync feature which ensures your Code Ocean Pipeline and the associated Git repository stay in sync.
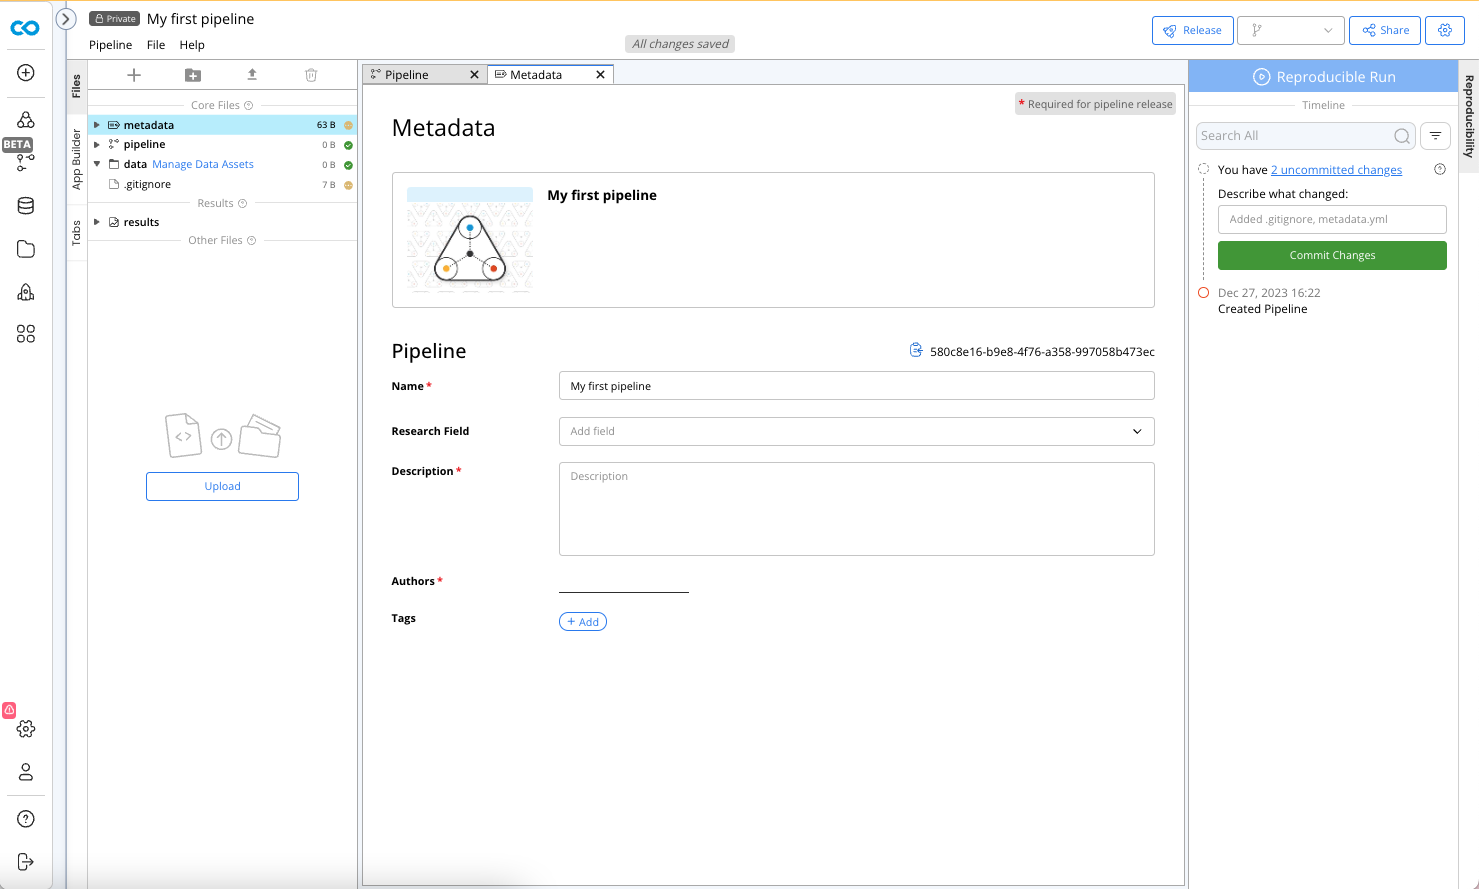
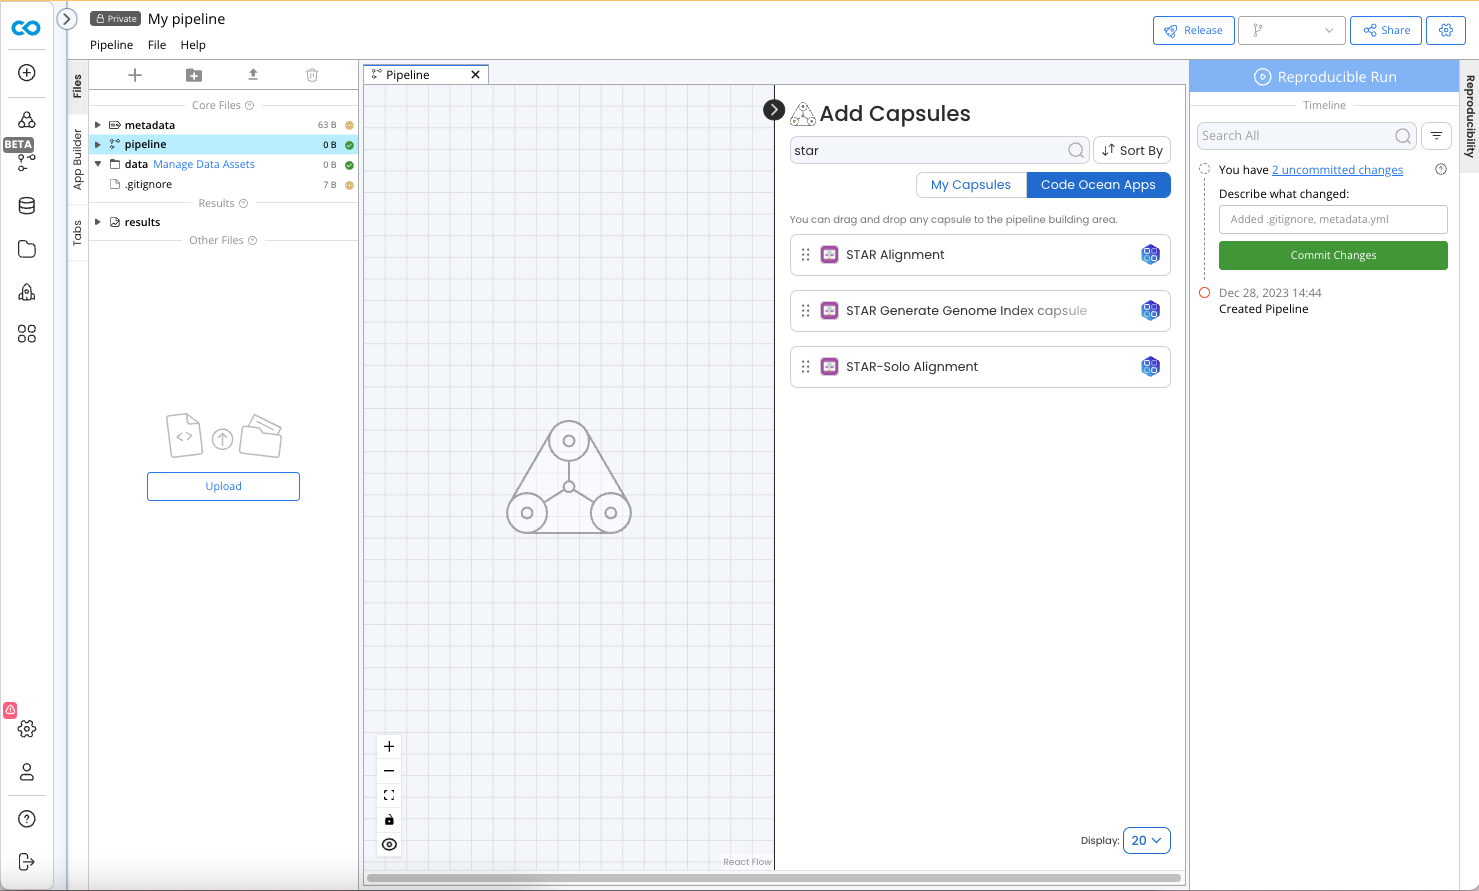
There are 3 main components of a Code Ocean Pipeline User Interface: File Navigation/ App Builder, Editor, and Reproducibility Panel. Navigate to the metadata editor by clicking metadata in the File Tree to rename the Pipeline, edit the description, and add authors and tags.
Add Capsules to the Pipeline
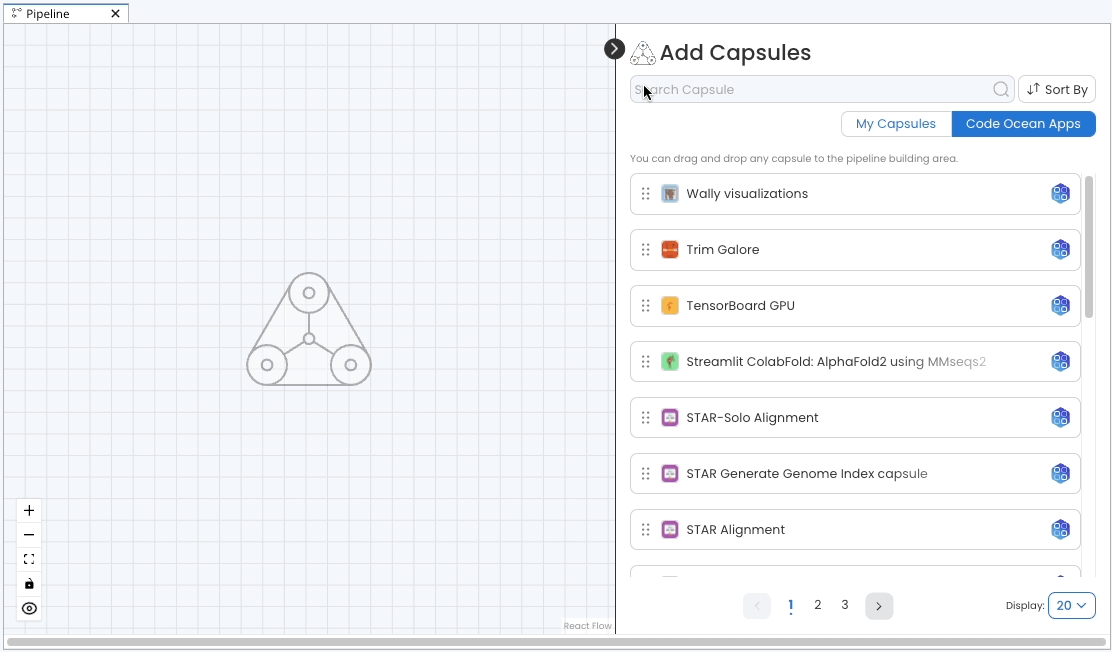
From the pipeline tab, you will see the Add Capsules menu. In the Add Capsules menu, find the capsules you want to add by first using the filter for My Capsules or Code Ocean Apps. Code Ocean Apps are pre-built capsules that are tested to work in Pipelines. Users can filter and sort My Capsules and Code Ocean Apps Capsules, and use free text search to find their Capsule.
Each capsule has its own card. Press the 3 dots to drag the card onto the Pipeline Editor. For release Capsules, a pop up will prompt you to select which version of the Capsule to use.
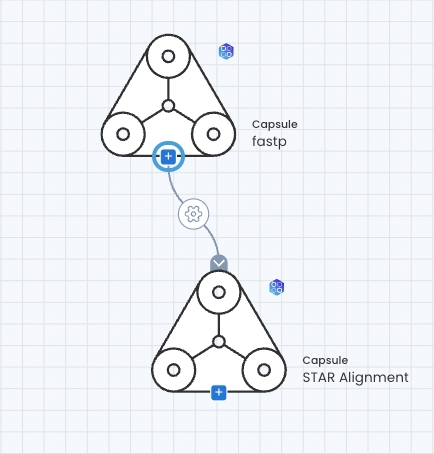
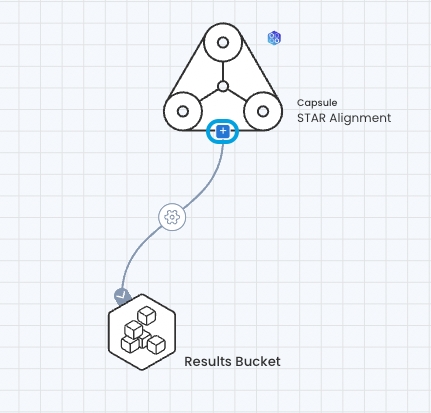
Form Capsule Connections
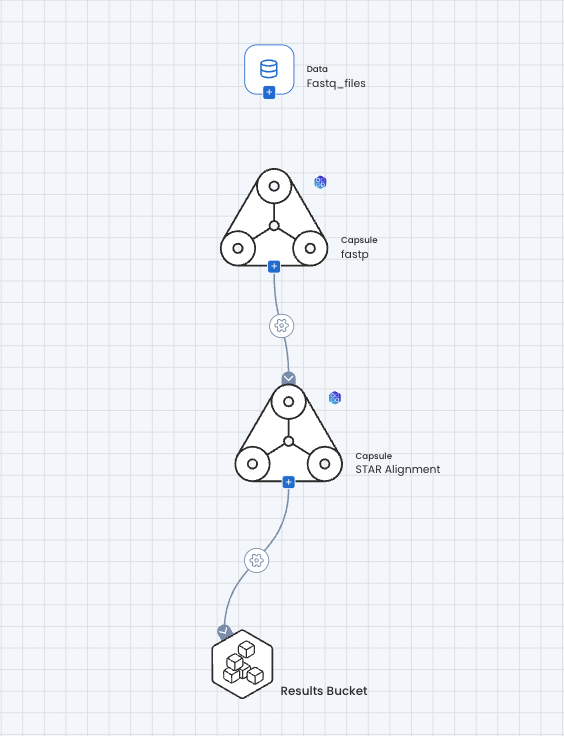
To pass files (data or results) from one Capsule to another, a Capsule connection must be created. Click + at the bottom of the Capsule and drag it to another Capsule to pass data from the output of one Capsule to the input of another.
To ensure that the Capsule's results are saved after each run, connect the Capsule to the Results Bucket. Click + at the bottom of the Capsule and drag it to the Results Bucket.
Attach the Data Asset
To attach a data asset to the pipeline's data folder:
Click Manage Data Assets next to the data folder of the file tree system
Find the desired Data Asset, and click the plus sign to add it to the Pipeline Builder.
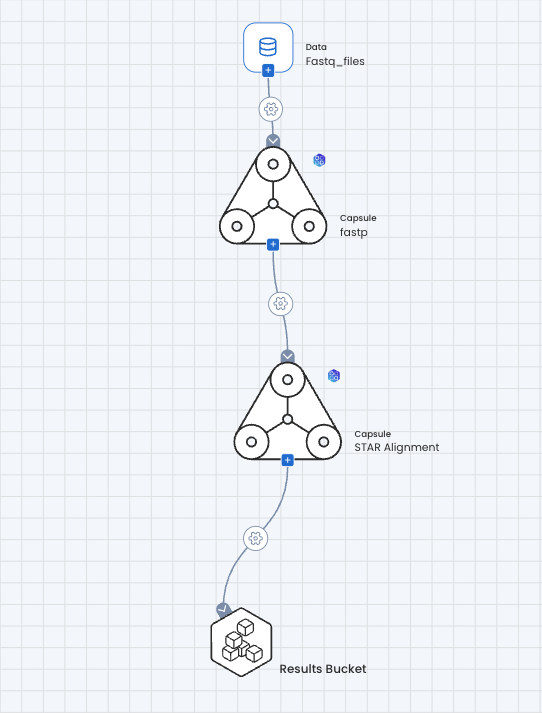
To use the data asset in the Pipeline, drag and drop the Data Asset from the data folder to the Pipeline Builder canvas.
Create a connection from the data asset to the capsule by dragging the plus sign to the capsule. Data assets can be connected to multiple capsules.
Configure the connections
Options can be specified for which files to pass between Data Asset and Capsules or Capsule to Capsule.
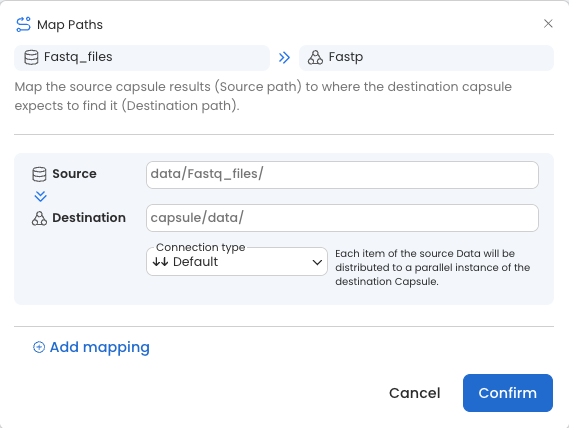
Click on the gear in the middle of the data to Capsule connection.
In the pop-up menu, specify which folders or files to pass from the source to the destination. The destination folder can be renamed.
Select a connection type: default, collect, or flatten. See Connection Types for more details.
Run the pipeline
To run the Pipeline click Reproducible Run at the top of the Timeline.
Once the run is complete, the contents of the Results Bucket can be viewed in the Timeline
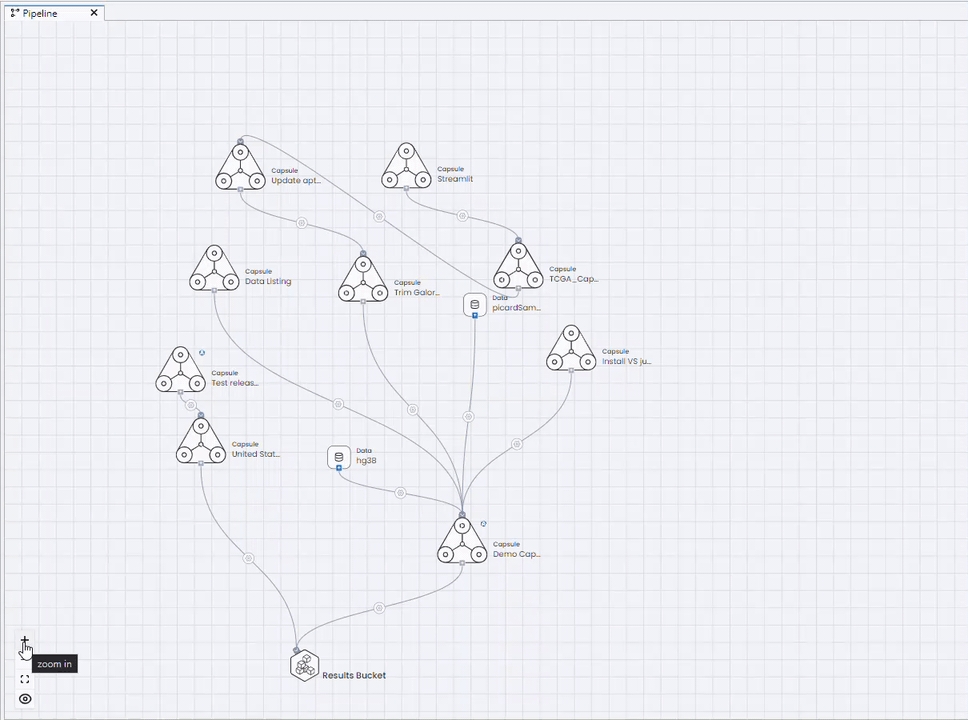
View the Pipeline
The bottom left of the Pipeline Editor has five options for viewing the Pipeline:
Zoom in - magnifies the Pipeline
Zoom out - minimizes the Pipeline
Fit view - shows the Pipeline in its entirety
Lock - disables moving Capsules
Eye toggle - shows the:
Connection types
CPUs
Memory
Data Type: Internal, External and Result
Capsule Type: Release, Code Ocean Apps