Capturing a Result
You can capture a result as a Data Asset from the Code Ocean IDE or a Cloud Workstation. This Data Asset can be saved internally to your deployment or to an external S3 location.
Capture Results From the IDE
Before capturing any results, verify that you:
Save the results under the
/resultsfolder and that the results are visible in the Timeline.Commit all the changes in the Capsule (click Commit Changes if not done yet).
Capture results by the following steps:
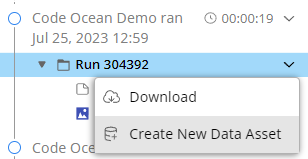
In your Capsule's Timeline, go to the result you want to capture and click the drop-down menu arrow.
Select Create New Data Asset.
Enter the following information:
Data Asset Name (required)—Use a meaningful name so that others can find the dataset easily.
Folder Name (required)—The folder name inside a capsule. Use a name that’s similar to the dataset name. Spaces and some special characters are not allowed here.
Description (optional)—Add some text to make the dataset easy to find and understand.
Tags (required)—Tags are another way to help people find your dataset.
Custom Metadata
Click Create Data Asset.
After you’ve captured the results, you’ll get a link to view them on the Data Assets page. There, you can validate that you’ve captured the correct results, download them, and share them.
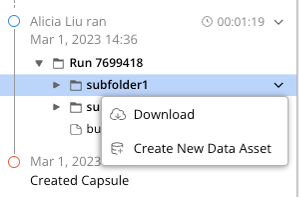
Capture Result from Folder
You can create a Data Asset from a specific folder of a result by right-clicking on the folder and selecting Create New Data Asset from the folder-level dropdown in the Capsule/Pipeline Timeline.
Capture from a Cloud Workstation
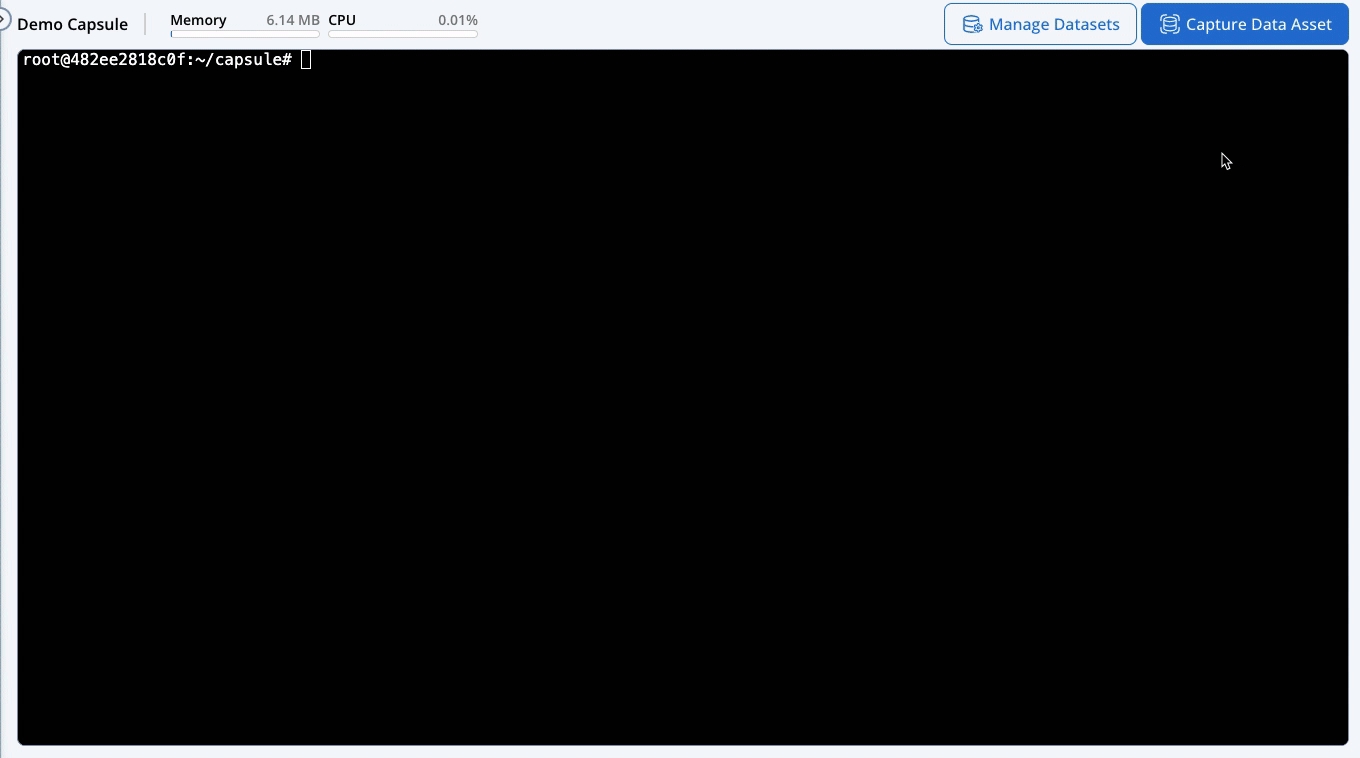
Capture Data Assets from the Cloud Workstation by the following steps:
Click on Capture Data Asset from the title bar in the Cloud Workstation. The Capture Data Asset pane appears.
Enter the following information:
Folder (required)—Choose the folder you want to capture. Note: to capture the
/resultsfolder, make sure to generate results in/root/capsule/results/.Metadata
Title (required)—Enter a meaningful name that helps users identify the data asset.
Description (optional)— Provide enough information so that, in the future, you and others can understand what you captured and why.
Tags (required)—Enter tags that will make it easy for you and other users to find your data asset. This is especially important when you capture multiple results from the same capsule or run script. Code Ocean remembers tags that were already used in the organization, for better consistency.
Provenance - check Provenance to save the commit ID and originating script.
Originating Script (required)— Validate the run script you used to produce the results. This allows you to distinguish between runs of the same capsule.
Commit and push any change from
/root/capsule/.
Click Capture Data Asset.
After you’ve captured the Data Asset, you’ll get a link to view them on the My Data page. There, you can validate that you’ve captured the correct Data Asset, download them, and share them.
By default, a new Data Asset is private (i.e. only the owner can see it). To learn more about sharing a Data Asset with others, go to Sharing Data Assets.
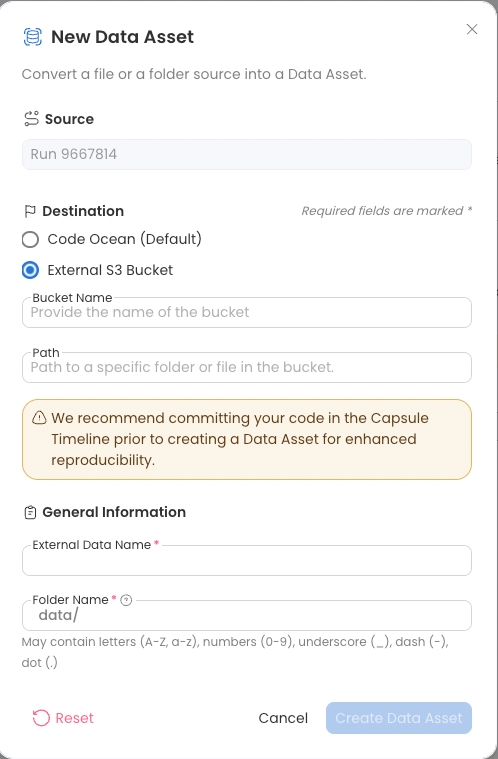
Saving Data Assets to an External S3 bucket
In both the Capsule IDE and Cloud Workstations, result Data Assets can be saved to an External S3 Bucket. This requires setting secrets.
Enter the following information:
Bucket Name (required)— The name of the bucket.
Path (required)— A specific folder or file in the bucket.
Data Asset Name (required)—Use a meaningful name so that others can find the dataset easily.
Folder Name (required)—The folder name inside a capsule. Use a name that’s similar to the dataset name. Spaces and some special characters are not allowed here.
Description (optional)—Add some text to make the dataset easy to find and understand.
Tags (required)—Tags are another way to help people find your dataset.
Custom Metadata